However, as Pampers® Institute expert and educational psychologist, Tshepiso Matentjie says: “Play and interaction with parents is important for brain, social, physical and emotional development in babies.”
Pampers® has come up with a solution to this dilemma. By making use of the items that you already have in your home, and your Pampers® Active Baby-Dry nappies, you don’t need to buy toys for your child to be able to play and learn.
Nappy changing time provides you and your child with some uninterrupted bonding time. The new Pampers® Active Baby-Dry nappies feature a host of new characters – the Pampers® Buddies. Use the Buddies to teach your child colour, animals and texture.
Here is another idea of how to make a toy from household items:
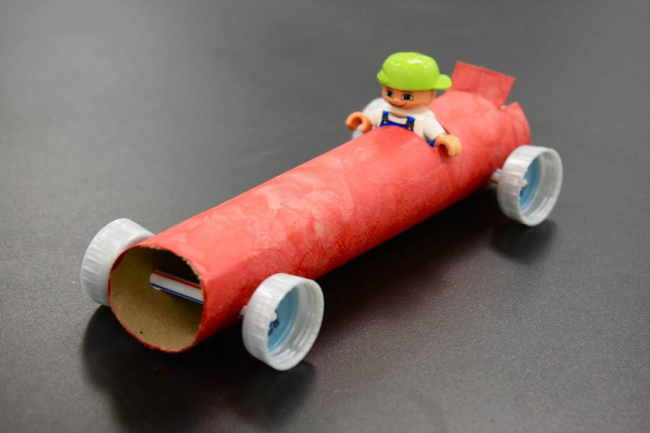
My first car
What you need:
- 1 paper towel roll
- 4 cold drink caps
- 1 straw
- Food colouring, wrapping paper, magazine pages or paint for decorating
- Scissors/ sharp knife
- Pencil
- Glue
What to do:
- The first step is to decorate the paper towel/ toilet paper roll.
If you are painting it – ensure that you wear old clothing. Place old newspapers on your working station to protect the area.
- If you are using normal paint: paint the roll on the outside and wait for the paint to dry.
- If you are using food colouring: mix the food colouring with a little water and use it like paint.
If you choose to cover the roll, glue the wrapping paper/ magazine pages onto the roll ensuring that the outside area is covered as neatly as possible.
Optional: if you would like, you can also paint the cold drink caps – as these will be used as wheels.
- Cut the straw in half.
- Place the roll in front of you horizontally and cut two small snips 3cm apart on one end of the roll. This will be the back of the car.
- Draw a one cm rectangle a few cm’s close to the back of the car and cut it out. This will be where the driver sits. (Use a Lego man if you have one to be the driver)
- Measure with the straws where the wheels of the car will be. Use the scissors or knife to cut 4 holes in the paper roll (2 holes on either side of the roll) – big enough for the straw to fit through.
- Use the knife to pierce holes in the centre of the caps, ensuring that the holes are big enough for the straw to fit.
- To assemble put the straw halves through the holes. One half in the front and the other at the back.
- Finally, slide the caps through the straws.
You and your child can now enjoy playing with your home-made car.
Latest posts by Contributor (see all)
- Video: Food allergies can cause your baby to be restless - June 27, 2014
- Boost your baby’s language skills with reading - June 27, 2014
- Top tips for your baby’s bedtime routine - June 27, 2014
-
No Comments" href="https://all4baby.co.za/babies-6-12-months/1115/video-food-allergies-can-cause-baby-restless/">

Video: Food allergies can cause your baby to be restless
-
No Comments" href="https://all4baby.co.za/babies-6-12-months/1106/top-tips-babys-bedtime-routine/">

Top tips for your baby’s bedtime routine
-
No Comments" href="https://all4baby.co.za/newborns-0-6-months/1091/sleep-important-baby/">

Video:Why sleep is important for your baby
-
No Comments" href="https://all4baby.co.za/babies-6-12-months/1086/tips-traveling-baby-toddler/">

Tips for travelling with your baby or toddler


 Saving...